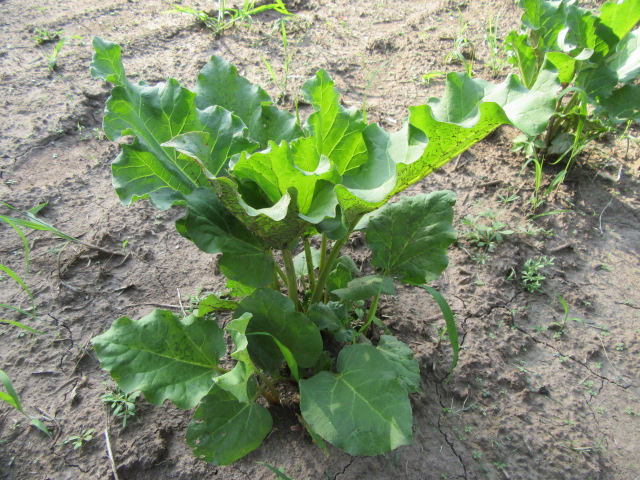
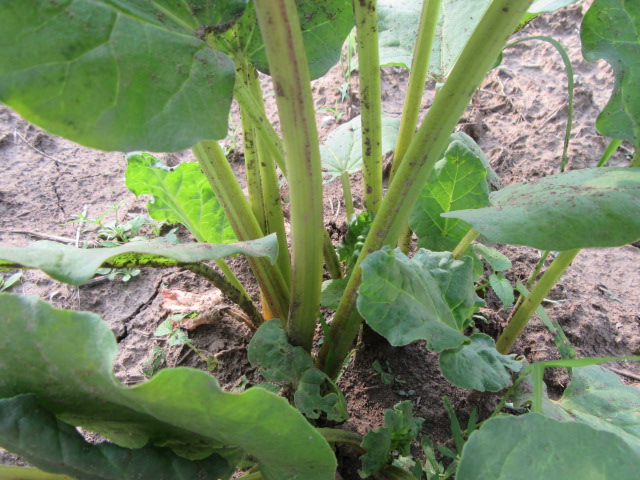
The garden on 7-15-20.
Hello everyone! I hope this post finds you well. Well, it is mid-July and the normal summer excitement and issues are upon us. Rain is hit and miss and sometimes we get a little but mostly the clouds just blow over. The grass has slowed down and I was debating on mowing or not. I always keep the mower deck at 4″ and then when it is hot and dry sometimes I don’t mow it at all.
But, a few days ago a friend needed me to change the blades on her zero-turn mower so I did. I had her mow a little in the back yard behind the house and it did a great job. I told her I was going to mow on Wednesday because I didn’t have money for gas at the time. Then I decided maybe I wouldn’t mow because it really wasn’t that tall and wasn’t growing because of no rain. Tuesday morning, when I was still in bed sleeping, I heard a mower go by my bedroom window… I may have heard a mower earlier but thought it was the neighbors. She had come and mowed the entire yard (around 3 acres) before I even knew it. I am very thankful she did that. Even though she had it set at 4″ because I told her before that’s the height I cut it at, it still seemed very short. I am not complaining, though. Even though I installed new Gator blades on my mower, her 54″ zero turn did a tremendous job.
First, let me introduce the tomatoes then I will get on with the worms and other issues… ‘Rutgers’, ‘Goliath’, ‘Mortgage Lifter’ and ‘Cherokee Purple’. I will introduce them the way they are planted…
The BELMONT ROOSTER TOMATO TEST SCORE:
I rate tomato taste on a score of 1-10, 10 being the best. Of course, tomatoes from the grocery store and what you get on your hamburgers from fast food are 1-5. I worked at Sonic for a while and sometimes I would rate them a negative number. Almost makes me not want a tomato on my hamburger from any fast-food chain or any restaurant for that matter. The tomatoes I picked up from a grower last summer were really good. He sells them in large quantities to someone but he gave me and a good friend of mine what he couldn’t sell for some reason. I would easily rate them 8-9… I don’t consider what the tomato looks like when rating taste…
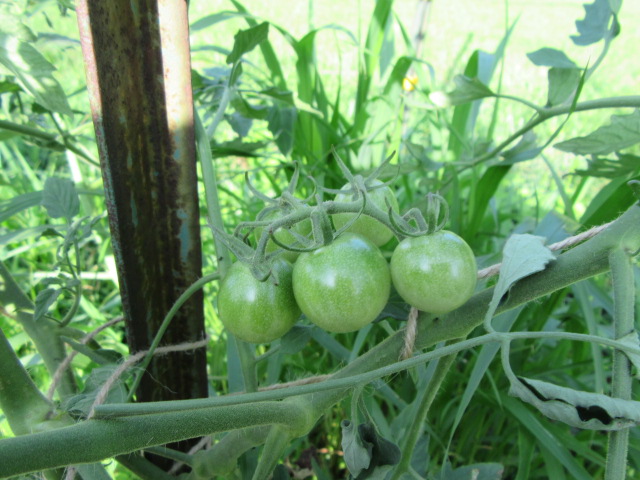
Tomato ‘Rutgers’

Tomato ‘Rutgers’ on 7-15-20.
‘Rutgers’ was one of the tomato varieties by dad grew when I was a kid along with ‘Super Sioux’. I remember those days of luscious, juicy, mouth-watering tomatoes, and every year it seems I try to relive those days. The first three plants in the row of 16 are the ‘Rutger’s. There were only three plants in the 4-pack… The plants have done very well, but are naturally somewhat smaller than most because they are determinate. I accidentally knocked one of the smaller fruit off

Tomato ‘Rutgers’ on 7-15-20.
‘Rutger’s was developed in 1934 by Rutger University’s New Jersey Agricultural Experiment Station and the Campbell Soup Company’s research facility. It was the most popular variety in the world for many years. During its popular era, ‘Rutgers’ made up more than 60% of commercial tomato sales. Hunt’s and Heinz favored ‘Rutgers’ as well.
Sales plummeted in the 1960’s because the thin skin was not suitable for automated picking. Farmers needed tomatoes with thicker skin that would store longer and travel farther with less spoilage.

Tomato ‘Rutgers’ on 7-15-20.
‘Rutgers’ is a determinate type of plant which means they usually have a large initial harvest with a few tomatoes during the rest of the season. Plants grow 4-5′ feet tall.

Tomato ‘Rutgers’ on 7-15-20.
Even though they are considered a “beefsteak” type, fruit only averages 7 oz. or so. I have eaten a few of these already and, while they have been pretty good, I was disappointed because they didn’t have that ‘OH MY GOODNESS! HOLY S–T” taste I was hoping for with the first tomato of the season. So, at this moment, I would have to rate the tase as a 7.
<<<<+>>>>
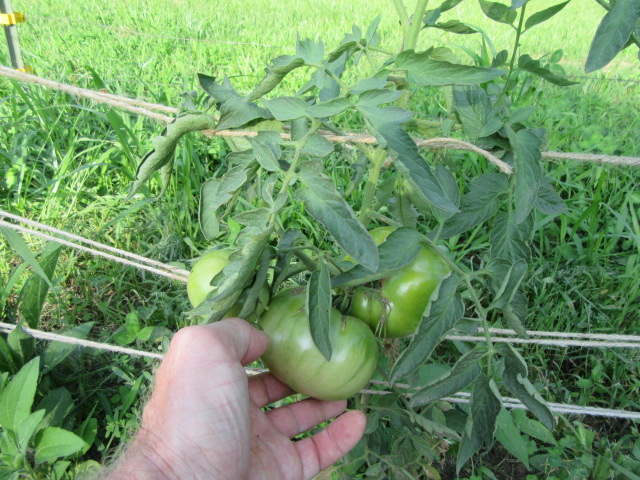
Tomato ‘Goliath’

Tomato ‘Goliath’ on 7-15-20.
The next four plants in the row are ‘Goliath’. I have grown these for several years and I like them for several reasons. The plants are very hardy and sturdy which they have to be for the abundance of large fruit they produce. ‘Goliath’ isn’t a new variety by no means as the original heirloom variety was introduced in the 1800’s. The indeterminate plants can grow 6-8′ tall and, in optimal conditions, can produce around 70 tomatoes per plant averaging 10-16 oz. and as much as 3 pounds.

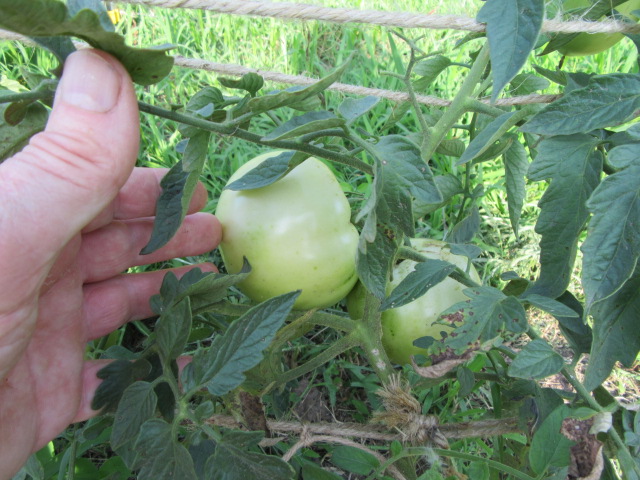
Tomato ‘Goliath’ on 7-15-20.
Also, depending on which ‘Goliath’ you grow and the conditions, you can expect ripe fruit anywhere from 65-85 days.

Tomato ‘Goliath’ on 7-15-20.
Sometimes you begin to wonder if those HUGE tomatoes will ever start to ripen. But when they finally do, you will see they were worth the wait. I have had any this year yet, but if I remember correctly they are AWESOME!

Tomato ‘Goliath’ on 7-15-20.
The plants are very strong and have very long leaves that provide good leaf cover. I haven’t eaten any of these yet this year because none have ripened. Once I try one I will give it my score.
<<<<+>>>>
Tomato ‘Mortgage Lifter’

Tomato ‘Mortgage Lifter’ on 7-15-20.
Now for the ‘Mortgage Lifter’… I grew this variety when I was in Mississippi in 2009 and it seems like I grew them after that but there are no photos. So, maybe not. I have grown A LOT of different tomatoes mainly because there are so many to try. There are five of these because there was one extra in the 4-pack.
Although ‘Mortgage Lifter’ is said to have been developed by William Estler in 1922, he didn’t register the name until 1932. Some information suggests ‘Mortgage Lifter’ was developed by M.C. “Radiator Charlie” Byles, but he developed ‘Radiator Charlie’ and ‘Radiator Charlie’s Mortgage Lifter’. Not only that, there were several other cultivars with the name ‘Mortgage Lifter’ during the depression era but Estler’s and Byles’ cultivars were the most popular. Of course, the story goes that Radiator Charlie sold plants for $1 each in the 1940’s and was able to pay off his $6,000 mortgage in six years…

Tomato ‘Mortgage Lifter’ on 7-15-20.
‘Mortgage Lifter’ is an heirloom that produces HUGE fruit up to 2 1/2 pounds or more. Fruit is produced on indeterminate plants that grow very tall, up to 9’. Tomatoes begin to ripen in 80-85 days and produce until “F”.

Tomato ‘Mortgage Lifter’ on 7-15-20.
Hmmm… The plants are great as far as leaf cover goes but they aren’t as strong as ‘Goliath’.

Tomato ‘Mortgage Lifter’ on 7-15-20.
The biggest problem I am having with ‘Mortgage Lifter’ is the weight of these HUGE clusters of HUGE tomatoes. Even though the branches are well supported, the stems with the tomatoes are not supported and some have bent and even split…

Tomato ‘Mortgage Lifter’…
I ate one a few days ago that wasn’t quite at its peak flavor. Then I had another one that was a bit oddly shaped so I had to slice it weird. The flavor? What is the score? I would have to give this one a 9. Being a pink tomato, the flavor isn’t quite so robust so you don’t get that “AHHH, UMMM, OH THAT IS SO GOOD!” It was close, though.
<<<<+>>>>
Tomato ‘Cherokee Purple’

Tomato ‘Cherokee Purple” on 7-15-20.
The last four plants in the row are the ‘Cherokee Purple’. It is considered one of the “black” fruited tomatoes that are supposed to have a distinctive flavor. ‘Black Krim’ was the type I tried in 2017 so I thought I would give this one a try. There is quite a story about the ‘Cherokee Purple’ which you can read by clicking HERE. Southern Exposure Seed Exchange was the first to offer this variety in 1993.
‘Cherokee Purple’ is an indeterminate plant that grows to only 4-6′ tall. They produce 10-12 oz. beefsteak fruit that is a deep, dusky rose with a greenish hue toward the stem with a dark red interior.

Tomato ‘Cherokee Purple” on 7-15-20.
Hmmm… I had noticed an issue with the fruit on the ‘Cherokee Purple’ but I thought they were just splitting very bad. Unfortunately, that wasn’t the only problem…

Tomato ‘Cherokee Purple” on 7-15-20.
The leaves are very long and provide very good leaf cover and the plants have sturdy stems. I have noticed some heirloom tomatoes can produce some weirdly odd-looking fruit

Tomato ‘Cherokee Purple” on 7-15-20.
There is a lot of good-sized clusters of tomatoes at the bottom of the plants but that seems to be the way they all are this year.

Tomato ‘Cherokee Purple’ getting ready for a taste test on 7-19-20…
This one isn’t that big, but it did ripen on the vine…

Tomato ‘Cherokee Purple’ on 7-18-20.
Well, the bottom has a lot of cracks but I wonder what the inside is like?

Inside of the Tomato ‘Cherokee Purple’…
Well, information says the inside is dark red with green gel in the seed cavities. So, what does it taste like? I put a piece in my mouth and had that pause. My eyes closed and I got that ‘OH WOW!!! THAT IS AWESOME!” So many words to use but none could quite describe it. A very distinctive flavor but I can’t quite find the right word or words to describe it. Some people say black tomatoes have a smoky flavor but I really couldn’t find the smokiness… Kind of like wine tasters who can come up with an elaborate description of how a wine tastes. I can’t find those flavors either… The score? 9.75!
<<<<+>>>>
TOMATO ISSUES…

Everything was fine and wonderful with the tomatoes and they were looking great UNTIL I saw two holes on one of the ‘Rutgers’ on July 9. For the most, the only pests I have ever had on tomatoes were hornworms eating the leaves and occasionally I would have whiteflies. I didn’t have whiteflies until 2017 when I apparently brought them home from the greenhouse on the tomato plants I bought. Anyway, after I saw those first two holes I started looking around for the culprit. I found nothing…
THEN, ON JULY 14…

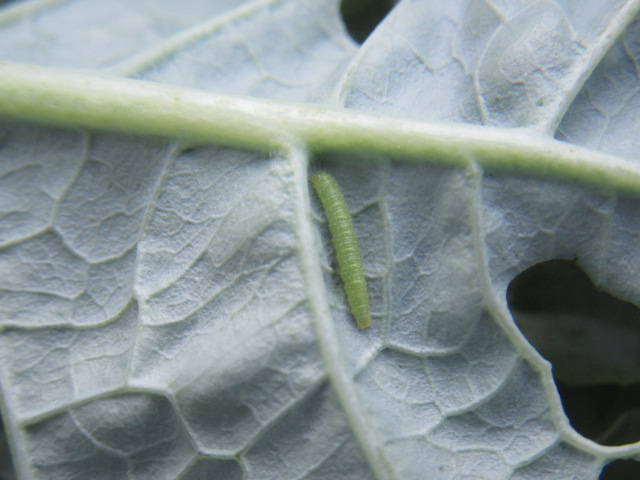
Spodoptera sp. (Armyworm species) on July 14, 2020.
I had been checking the tomatoes daily, sometimes twice a day, for hornworms and whatever I could find because you never know… Up until July 14, I had seen nothing except for an occasional hole since July 9. THEN I found this HUGE worm on one of the tomatoes at 12:12 PM on July 14…

Spodoptera sp. on July 14.
Of course, as you can tell, I took photos to put on iNaturalist… I had never seen these before on my Tomatoes or anywhere else so I had to find out what it was.

Then I found this tomato with a big hole in it…

Spodoptera sp., two of them, on July 14.
Then I found two huge worms, side by side, that were different colors! WHAT THE HECK!!! (I think I may have used a different word originally).

Spodoptera sp. on July 14.
One of them is mostly black while the other is mostly gray!

More holes and poop!

Whiteflies on a tomato leaf on July 14.
Then there were whiteflies. Whiteflies really don’t cause an issue for me and they usually appear when it gets hot and dry and there isn’t much breeze. I made sure I have a Neem Oil concoction on hand in case they get carried away. A few days later, when we were supposed to have rain, the wind picked up and it sprinkled a little. The next day, the whiteflies were completely gone. Of course, they came back…
Back to the worms…

Hmmm… Tomato Cherokee Purple’ on July 14.
Apparently, this was not just a cracking issue…

GEEZ! It was like an overnight disaster. Guerilla warfare! Rather worm warfare! They come in and eat then hide…
I uploaded the photos of the worms I took on iNaturalist to get an ID. Suggestions were the Spodoptera genus, Spodoptera ornithogalli (Yellow Striped Armyworm), and Trichordestra legitima (Striped Garden Caterpillar). The moths of these caterpillars look the same, according to the photos, but I have not seen any in person. I messaged a “caterpillar expert” on iNaturalist so he could check out the photos I uploaded. I had the black one listed as Spodoptera ornithogalli and he commented saying,
“One of the armyworms but I’m not great at telling them apart. These can be physically moved away from plants if they are being destructive. =)”…
I listed the grayer one as Trichordestra legitima and he didn’t make a comment but suggested it also as a member of the Spodoptera genus…
WELL, DOUBLE GEEZ! Apparently, there are quite a few species of both genera and they are variable as far as color goes. They cause the same issues, which is quite obvious… Some information about one or the other mentions the moth lays eggs, a lot of them, and covers them with scales… Hmmm…

I have not seen much evidence of eggs but I did find this weird thing on the 15th… Apparently, it was a newly hatched worm and left this behind… So, why didn’t I notice this before it hatched when I was checking for worms before? Hmmm… Because it wasn’t there…

Darn things!!!

Hmmm… Then I noticed these, ummm, eggs (?) around the stem of a tomato. There is nothing online to suggest whodunit… The moths DO NOT lay eggs around tomato stems… Sometimes other critters, like ants, move eggs and aphids to parts or plants they want to feed on but aren’t capable unless they get something else to do the work… Then they feed off of their secretions or juice…
I only found a few of the hornworms on one occasion, when I didn’t have the camera and haven’t noticed any since. After picking off the larger armyworms on two occasions I have only found small ones on the leaves so no additional damage has been caused. Sometimes I check and find no worms at all. SO, hopefully, I have them in check now. WHEW! 🙂

Tomato ‘Mortgage Lifter’ on 7-15-20.
With the ‘Mortgage Lifter’, many of the tomatoes appear to be so heavy the stem starts to pull away from the fruit. This is a good place for the small armyworms, or whatever they are, to start feeding on the tomatoes. When they are very small they can’t chew a hole very well…

Tomato ‘Mortgage Lifter’ vine dying on July 17…
I noticed this issue with the ‘Mortgage Lifter’… Half of the plant was dying because…

Tomato ‘Mortgage Lifter’ on 7-15-20…
The weight of the vine split where the two branches join. SOOOOO, I learned a lesson and I am correcting the problem. When I tied the string at the post and wrapped it around the vine, I then tied the other end in the center between the posts. As the fruit grew and the vine became heavier, the top string was pulled down causing the branch to break. The solution is to tighten the string wrapped around the vine and move it closer to the post. OH, and don’t use balers twine around the stems… I have been replacing some of the twine with strips of material where I have noticed the twine cutting into the stems. That has only been a problem with a few plants. Some people keep only one main stem and just tie it to the post which also eliminates this issue. You can use cages BUT you would certainly have to use one that is very sturdy… My neighbor in Mississippi tied his tomatoes to cattle panels…

Tomato ‘Mortgage Lifter’ cluster bending the stem…
Besides that one branch splitting, several clusters of ‘Mortgage Lifter’ are so heavy the stems bearing the fruit are also bending. As long as the stems don’t break I think it will be OK.

GEEZ!
I attempted to support one of the clusters and the stem broke…

Tomato ‘Mortgage Lifter’ nearly touching the ground…
I know it sounds like I am picking on the ‘Mortgage Lifter’ but I am just pointing out some of the issues I am having with the tomatoes (besides the worms). The cluster in the above photo is close to the ground and is so heavy it is almost touching the mulch. If it weren’t for the hay, it would be sitting on the ground soon.
SOOOO, the issue with the ‘Mortgage Lifter’ is that the vines and stems are not strong enough to support the weight of the fruit.
<<<<+>>>>
FRIEND OR FOE?

Coleomegilla maculata (Spotted Lady Beetle) on 7-16-20.
With all the different bugs and worms lurking about in the garden it makes you wonder who are friends or enemies. There are quite a few Lady Bugs which are also called Lady Bird Beetles. Well, pretty much everyone I know calls them Lady Bugs but I suppose they are technically supposed to be called Lady Bird Beetles… ANYWAY, I saw this strange beetle on a tomato that wasn’t one of them or quite like any other I had seen before. Before I decided to smash it or not, I thought I better get a photo and identify it. Luckily, it turned out to be a friend called Coleomegilla maculata commonly known as the Spotted Lady Beetle. There are over 6,000 species in the Lady Beetle family Coccinellidae found throughout most of the world…

Coelostathma discopunctana (Batman Moth) ?, 7-18-20.
I found this tiny moth while scouting for worms on a tomato leaf on July 18. I didn’t have the camera so I went back to the house to get it… I was very curious about this tiny moth and wondered what damage its caterpillars might do. Unfortunately, even though I kind of have it identified, there isn’t much online about it. In fact, the photos of this species on iNaturalist show moths of many colors that are likely members of other genera and species… There were several other suggestions, as far as what it could be, with all the same issues. Many photos of varied colored moths look the same as the photos of other species. So, whether it is a Coelostathma discopunctana (Batman Moth) for sure I have no clue… I have to say perhaps the species is variable but you know how I dislike using that word… Species in the bug world are like the plant world. Many species have been named that are synonymous with other species…

Murgantia histrionica (Harlequin Bug) on 7-18-20.
Then I found this critter on a kale leaf that sort of posed but seemed a little hesitant to be photographed. It was like it was unsure if I would kill it or leave it alone. I told it I wouldn’t kill him unless I knew for sure if he was a friend or foe. With that, he became even more nervous… Sorry, the photos are somewhat blurry. I think the bug was shaking. 🙂

Murgantia histrionica (Harlequin Bug) on 7-18-20.
It seemed to think I was getting a bit nosy and refused to show me his mouth. He turned around and decided it was time to leave. After I went to the house and uploaded the photo I found out it was the dreaded Harlequin Bug (Murgantia histrionica). OK, so I have heard of that one, and although I have seen them before I didn’t know what they were. Now that I do for sure… I also found out they especially like cabbage, kale, and other brassicas. Hmmm… So, along with the worms, there are these. In the past few days, the kale has been ripped to shreds, and now not even the new leaves can be eaten…
During the day so many critters are hiding from the heat and various predators like birds and wasps. They come out at night when it is cooler and they can feed in a little more peace… It is no telling what all lurks around in the dark of night in the garden. Hmmm… Maybe I should go out at 2 AM with the flash lght. Maybe then I will see who is eating what and whom…
<<<<+>>>>
NEXT UP…

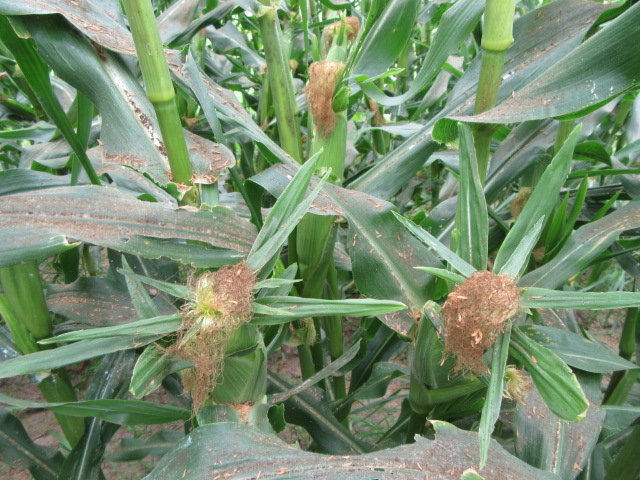
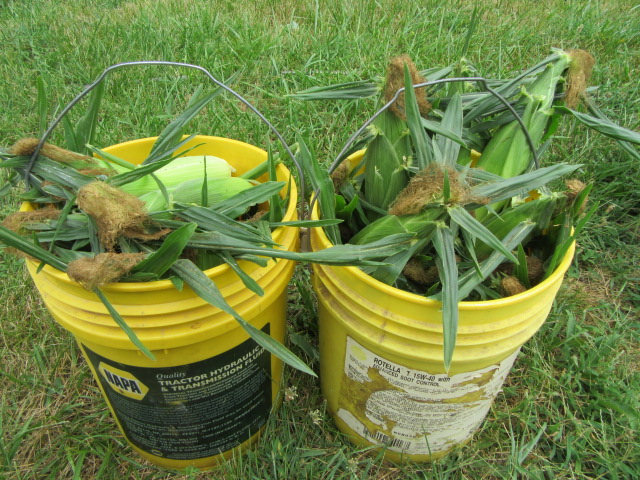
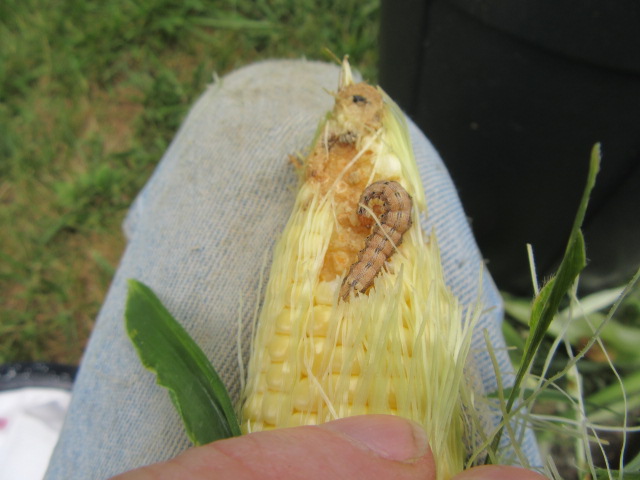
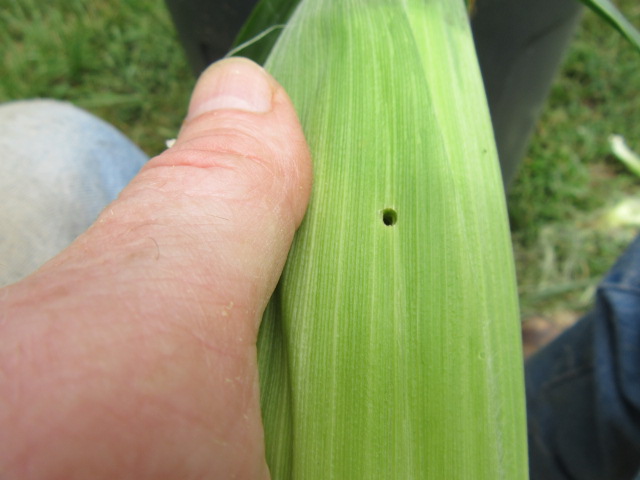
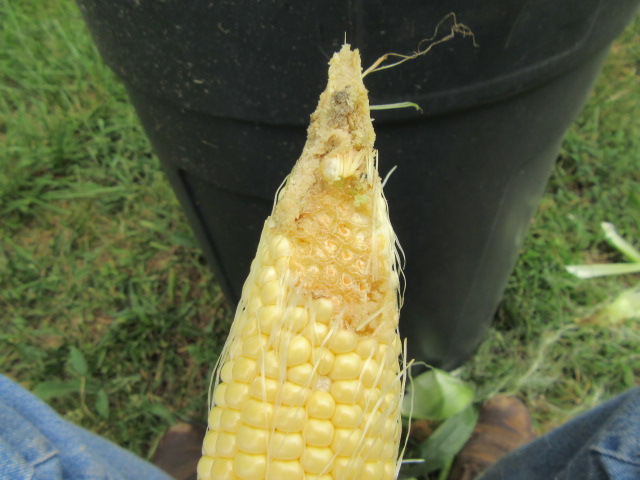
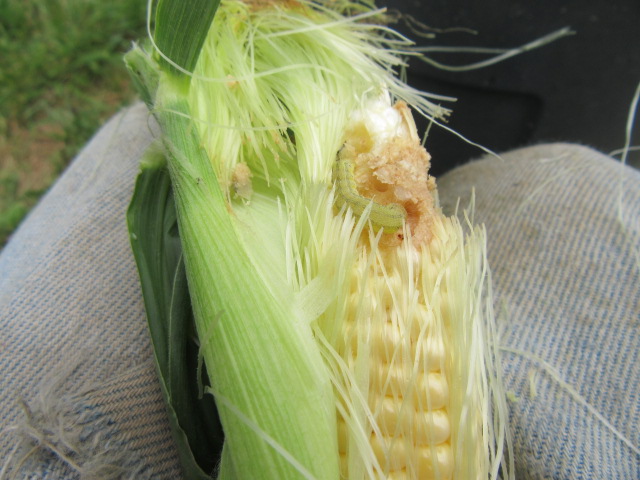
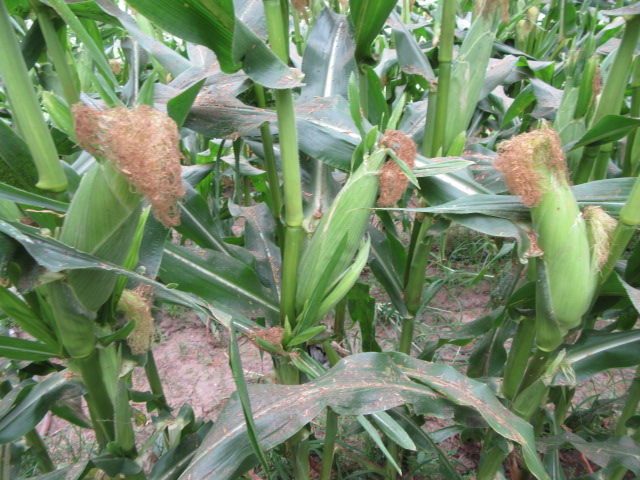
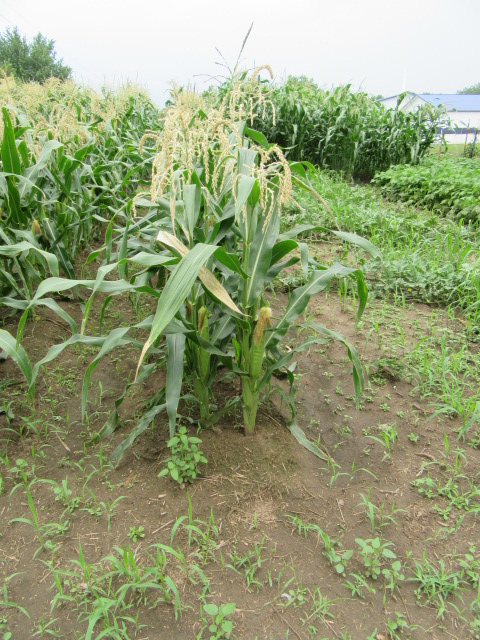
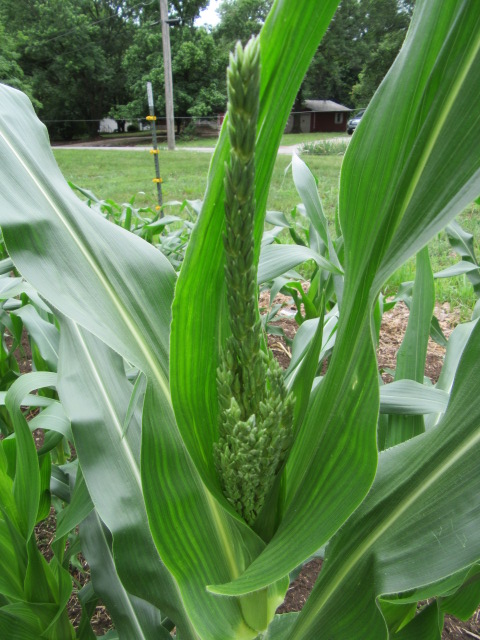
Hopefully, the next post will be about the watermelons. I have been working on it off and on for a few weeks but I get busy with this and that and the post gets delayed. I did harvest some of the ‘Incredible’ sweet corn, which I didn’t photograph. I picked about 50 ears and a few were really nice and the others just so so. Even though the silk was brown and appeared ready, some of the cobs weren’t as plump as they could have been… Maybe I was just anxious… Anyway, I will try and wait a little longer for the next picking even though the silk is brown enough. Maybe the ears will get a little plumper. I know you are supposed to peel back some of the cover leaves (or whatever you call them) to check the kernels and milk, which I did on few earlier. But, then the bugs get inside which eat the corn. So, better I just “feel” before picking without being overly anxious…
OH, one more thing… Maybe two.

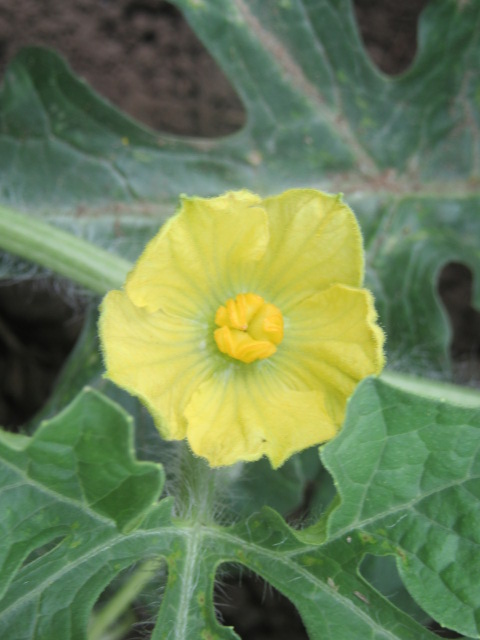
The Okra ‘Jing Orange’ has been budding for over a week and the plants have really taken off. They like it hot!

While I was finishing up this post I could hear it thundering. I took this photo when I went out to get a current photo of the Okra buds. I decided I would take ore feed and water to the chickens and by the time I got to the house, it was raining. THANK GOODNESS!!!
Until next time, be safe, stay positive and well, always be thankful, and GET DIRTY and SWEAT!